Sunday, October 24, 2010
Saturday, October 23, 2010
PE6_Flash Examples
Segment 3_Using ActionScript:
 |
| Screenshot of the flash game created by Angela Dixon |
This is a video game I started making last summer called Squirrel Attack. Although the game is not completed I wanted to share a little background about the mechanics of designing the game. What you are looking at is the coding to make the game function. This code is called ActionScript. According to the dictionary, ActionScript is the scripting language that Flash uses to control objects and movies. Although I still have more work to done with my game I wanted to show the engine of the design that control the function of the game.
PE5:Flash_Example
Segment 2_How to create animation:
I decided to use words to make animation. Just like the directions for creating graphics, I went to the timeline and made layers. Putting each word on separate layers, I used the motion tween to create animation. The timeline will become a light blue color to let the user know that the motion tween is working. After assigning motion tween to each word, then I click and drag in the timeline over to my designating spot, so my words could pop up one at a time. Final, I test my movie to see if it works, if so, then I created an animation movie.
I decided to use words to make animation. Just like the directions for creating graphics, I went to the timeline and made layers. Putting each word on separate layers, I used the motion tween to create animation. The timeline will become a light blue color to let the user know that the motion tween is working. After assigning motion tween to each word, then I click and drag in the timeline over to my designating spot, so my words could pop up one at a time. Final, I test my movie to see if it works, if so, then I created an animation movie.
Friday, October 22, 2010
PE4: Flash_Example
I took the time to learn about how to use Flash CS5. Since Flash has many areas to learn about such as creating graphics, using the timeline animation, and others. I decided to cut my learning process into two segments.
Segment 1_How to create graphics:
 |
| Screenshot of flash.swf by Angela Dixon |
To design graphics in Flash is fairly easy. The property panel on the right-hand side allows the user to change the dimension, background color, and many other things. The applicator also has templates to set up the stage size for you. Flash has some similar design tools like other applications, so it is not difficult to work with it. Create a new layer before using the drawing tool. Next from the tool bar selects the rectangle tool to create a box. Each time the users create a new graphic they should make a new layer and name it.
Segment 2_How to create animation:
I decided to use words to make animation. Just like the directions for creating graphics, I went to the timeline and made layers. Putting each word on separate layers, I used the motion tween to create animation. The timeline will become a light blue color to let the user know that the motion tween is working. After assigning motion tween to each word, then I click and drag in the timeline over to my designating spot, so my words could pop up one at a time. Final, I test my movie to see if it works, if so, then I created an animation movie.
Sunday, October 17, 2010
PE3_Illustrator
 |
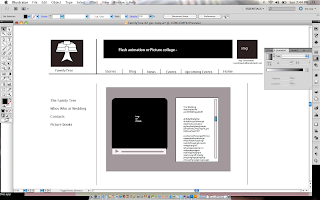
| Screenshot of a process layout created by Angela Dixon |
PE2_Photoshop
 |
| photo from my daughter's graduation |
Since this program requires images with our posting, I thought Photoshop is a handy tool to use for pictures. This is a picture that I took at my daughter's graduation. I wanted to see if I could make her photo color and everything else black and white. This is the beginning process of me manipulating the photo.
PE1_AfterEffects
Saturday, October 16, 2010
BP9_Voki
Get a Voki now!
What you have witnessed is my avatar that I created using Voki. Voki is a web 2.0 tool that is design to motivate students to interact with others. It is a new approach to email others with a twist to it. I choose this tool because this is fun and easy way for kids to be motivated in using technology. Teachers love it because they found a new way to give out lesson for students to listen!
Voki is so simple to use all you have to do is registering your name, confirm, and then create. The instruction on how to create your avatar located on the right-hand side of the screen that explains everything you need to know. After creating your avatar, then you create voice by either using text from your phone, record your own voice, or type what you want to say. You can change the style of the voice by using the drop arrow. Next, choose a background for your avatar to set the stage, and then you can publish it.
You can publish your avatar two ways. One way you can publish by sending it through email to yours friends. The second way you can publish your avatar by copying the code and posting it to your choosing webpage such as blogger, facebook, twitter, and others.
Voki is a perfect tool to use for my action research. By using this tool kids at the youth center will find this tool a fun way to send email notes to parents keeping them informed on the upcoming events.
Tuesday, October 12, 2010
Sunday, October 10, 2010
BP5_Animoto Web 2.0
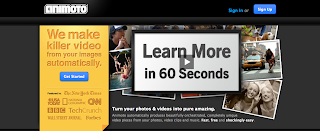
 After thoroughly searching the web 2.0 guru website to find the best match 21 century tool that relates to my Action Research project, I stumble upon Animoto. Animoto is an application that transform personal or business pictures into a 60 second video. It is fast, free, and user friendly. If this news is a fantastic deal, then wait there is more. For a small fee to access to all the services, users can earn money each time a follower visit their video. Wow…it cannot get any better than that!
Now, I know I sound like a commercial…but when I research this link my mind started brewing ideas to help improve my Action Research. In my Action Research, my goal is to educate parent about the importance of the after school technology youth center. So I thought the best way to reach out to the parents is to use a 60 second commercial video. Plus, the youth center, will gain profits each time parents visit the video.
I choose this tool for this week posting because it follows the path to my research. Also, I thought the best way to educate the parents is to show them what the youth center does. How technology is not just a privilege, but it is a necessary to their child’s learning. The best way to express the benefits of the center is to show them pictures of the center and kids interacting with technology.
Monday, October 4, 2010
BP4_Web 2.0 Tool
SimpleDiagram
After using SimpleDiagram, I found this program to be fun and creative, but simple to use. The name of the program only enhances the nature of its purpose. SimpleDiagram is highly recommended for educators to interactive with the youth. Using this tool will provide better communication between instructors and their students.
Sunday, October 3, 2010
Thursday, September 30, 2010
BP1_Google Reader
Welcome to my first blog page! I am excited to travel this journey with my fellow classmates who will be helping me shape up my research. It is a bit scary to talk to others about an undeveloped idea…but it is an experiment research so hopefully, I will be able to put pieces it all together for someone to understand.
So the five RSS feed that I uses to help me are:
This is an excellent site to go to for anyone who wants be inspire by different designs. The site has free samples to downloads as well as tutorial lesson to create new designs. Definitely, anyone could quickly learn tricks of the trade of creating something using adobe products. This website is a great way to help style original designs.
You may have heard of lynda.com....but not too many people heard of Safari Online Books. Not only does Safari Online has video tutorial lessons to follow, but they have books to download onto your computer. For people who need technology books to study try out this website first to see if they have it. Sometimes I may be out of the area to access the Internet to study...so I just simply download the book that I need and print it out.
Six Revision
For those who share interest in Graphic Design or Media Interactive Art, use this website to get ideas and valid information about the field. This is another website that gives tutorial lessons using adobe products and others...but with a twist of informational articles to help give points on related career choices. Whenever I want to create a quick logo or background image, I will go to either this site or creative nerds.
lynda.com
Of course lynda.com is the best website to go to for technology tutorials. What I like best about lynda.com is after completing the tutorial session you can get certified with the program. For example, if I wanted to learn how to build websites using Dreamweaver, after completing the session I will be certified building website using the software.
adobe.com
If you going to use adobe product, why not, go straight to the head of the source, adobe.com. Adobe website has many archive to view. Anyone who is a member could check out their videos and learn how to use their products.
As an artist in Media Design, I find each one of those links were useful in the field to better serve my purpose.
Subscribe to:
Comments (Atom)


